Once the texture file was imported I changed the specular and gloss levels of the shark and added a slight bump map for definition. Finally I gave the shark a new set of teeth by modelling one tooth and then creating duplicate instances of it. I used symmetry to save time and put all of the teeth objects into their own group to make them easier to select and modify.


After finishing my other two models I felt I had learnt a lot since creating this model and so I decided to try and improve it. To do this I had to revert back to a back up copy of the shark to where I had just created the mouth as the other file permanently applied the Turbosmooth modifier making it virtually impossible to use UVW texturing. The first thing I done to improve the model was to make the body and tail rounder. Then I added the UVW unwrap modifier and rendered a texture template. I used the template below to create the texture file in Macromedia Fireworks CS4 for the shark then applied it in the material editor.

Had huge problems trying to open my 3DS max 2010 file in 3DS 9. Something to do with missing DLL files. Tried exporting the model and importing into 3DS max 9. This caused problems as it meant my modifiers were constantly applied and texture files could not be read. Therefore I had to wait until I had access to 3DS max 2010 again before making any changes.
Converted the shark with modifiers to it's own editable mesh so the texturing could be cleaned up and created the sharks teeth by extruding the polygons. Adjusted the mouth shape slightly. Changed the textures slightly to get rid of noticeable lines where the texture was being tiled.


Connected the paths to create a new polygon for the inside on the mouth. Used the cut tool again to add more vertices in order to be able to manipulate the mouth into the right position. Adjusted the shark's nose size slightly and added eyes. Worked on texturing the shark. Used Adobe Fireworks CS4 to create some bitmaps to import into the material editor.
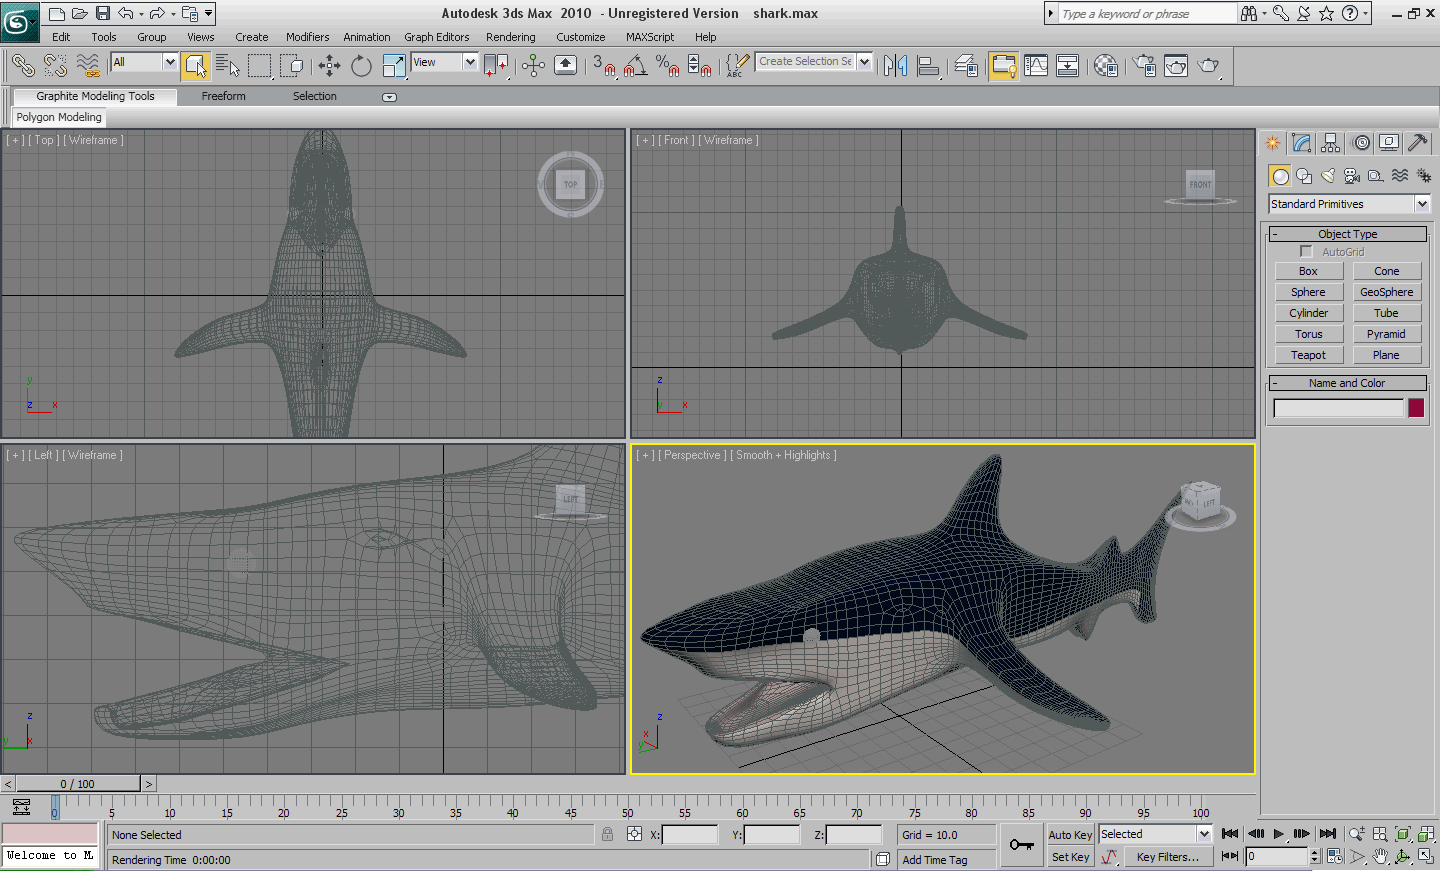
Used the cut tool to create a mouth and then manipulated the sharks nose with soft selection on to make the mouth look more open.

Started devloping the front of the shark in 3DS max 10. Used the material editor to give the mesh some colours.

Developed the back of the shark. Created the sharks tail as well as it's fins. Added a Tubo smooth modifier to make it look less jagged.

Started the development of my shark model in 3ds Max 9. I found some images to use as a reference guide and one particularly good image that was a simplified clip art drawing of the shark from multiple angles. Using this image I manipulated a cube into the shape of the shark. First from top view, then side and front.
Your images do a good job of showing how the model progressed
ReplyDelete